Installation
docker :
docker run -p 8080:8080 -e KEYCLOAK_ADMIN=admin -e KEYCLOAK_ADMIN_PASSWORD=admin quay.io/keycloak/keycloak:24.0.1 start-dev --features=preview
or
Download the Keycloak server from the official website and start it with the following command:
bin/kc.sh start-dev --features=preview
In either case it is important that the flag: --features=preview is passed along in order to enable the "token-exchange" option (see below).
Keycloak Realm Configuration
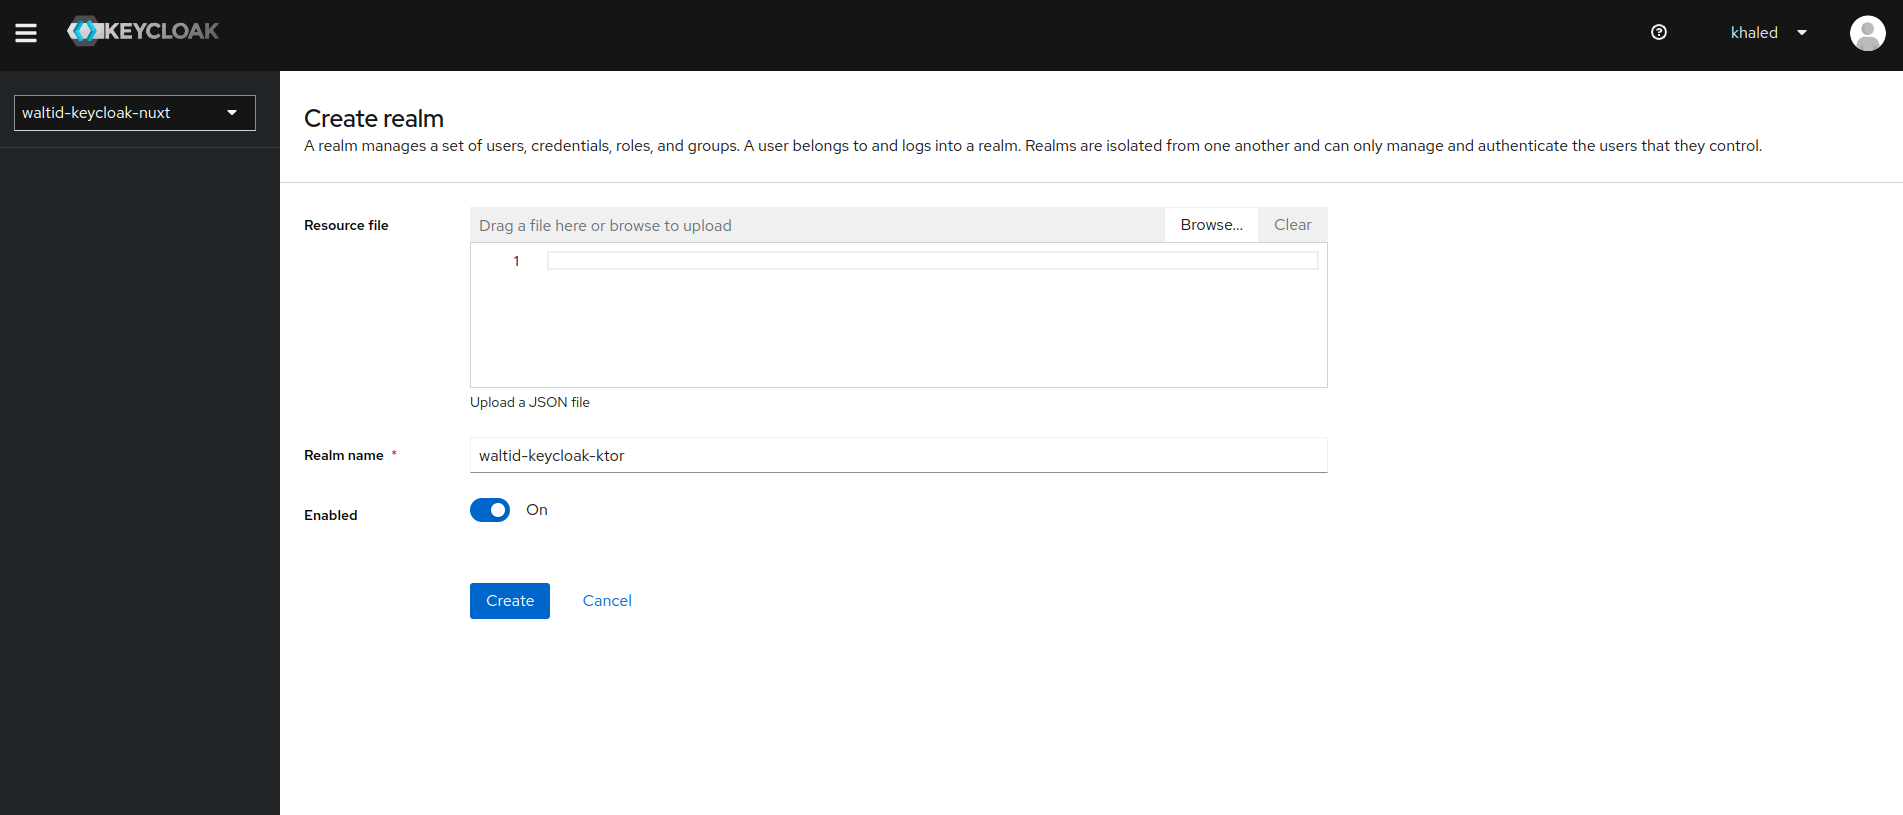
- Create a new realm named "waltid-keycloak-ktor" in the Keycloak admin console.
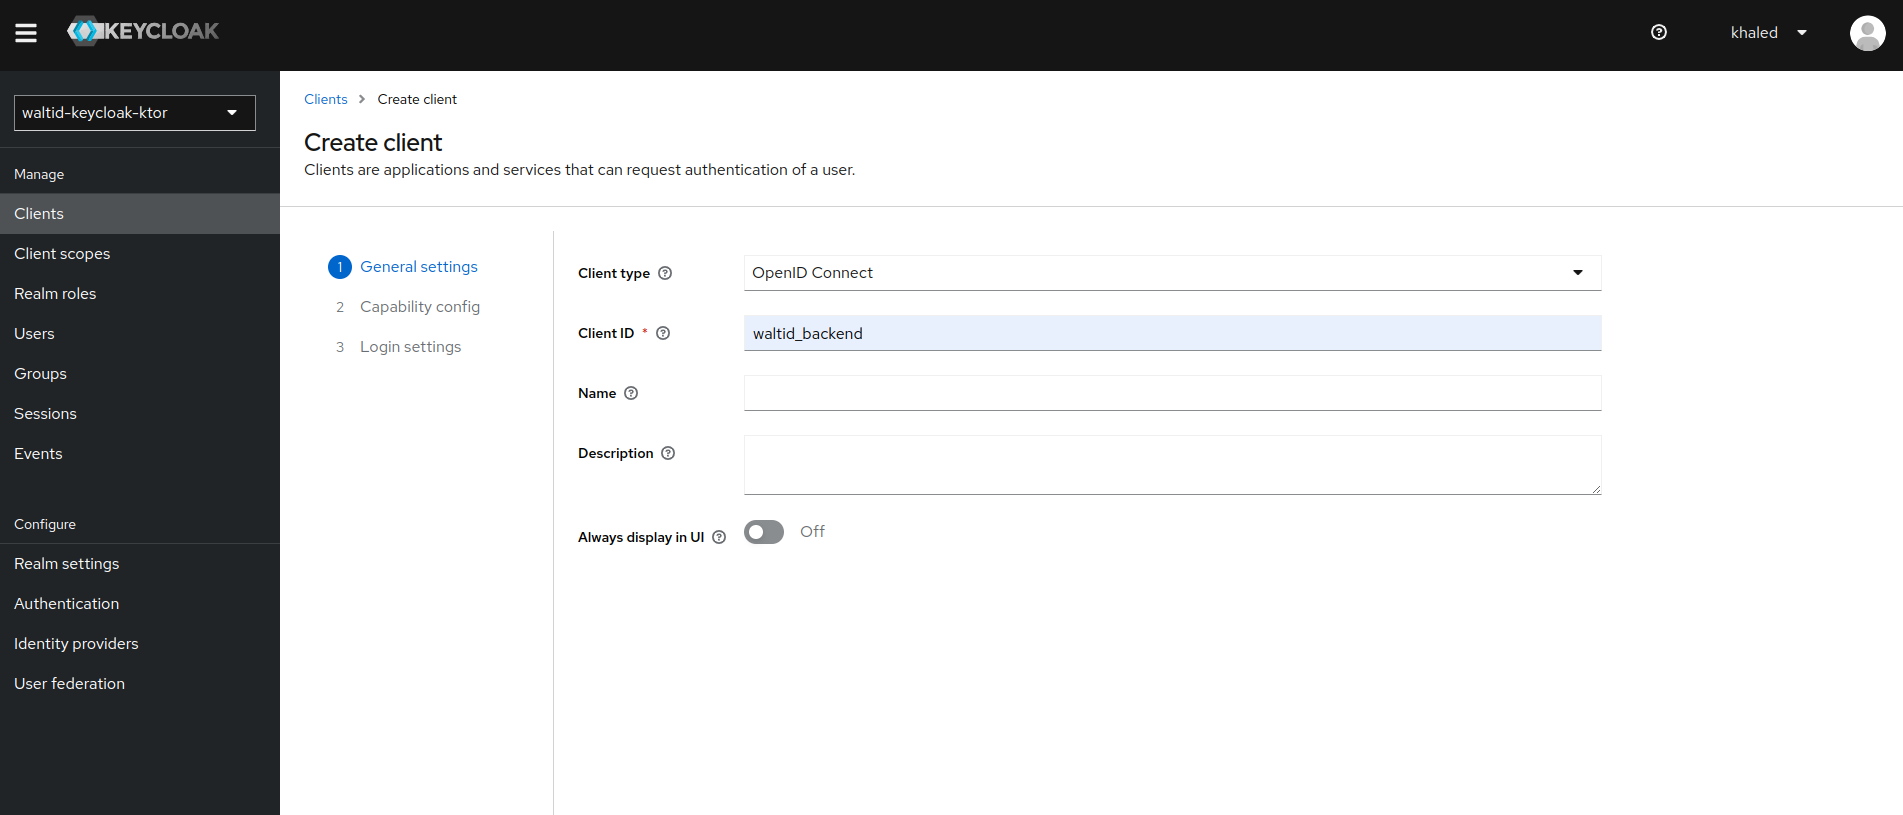
Client Setup
- Setup a client with the following configurations:
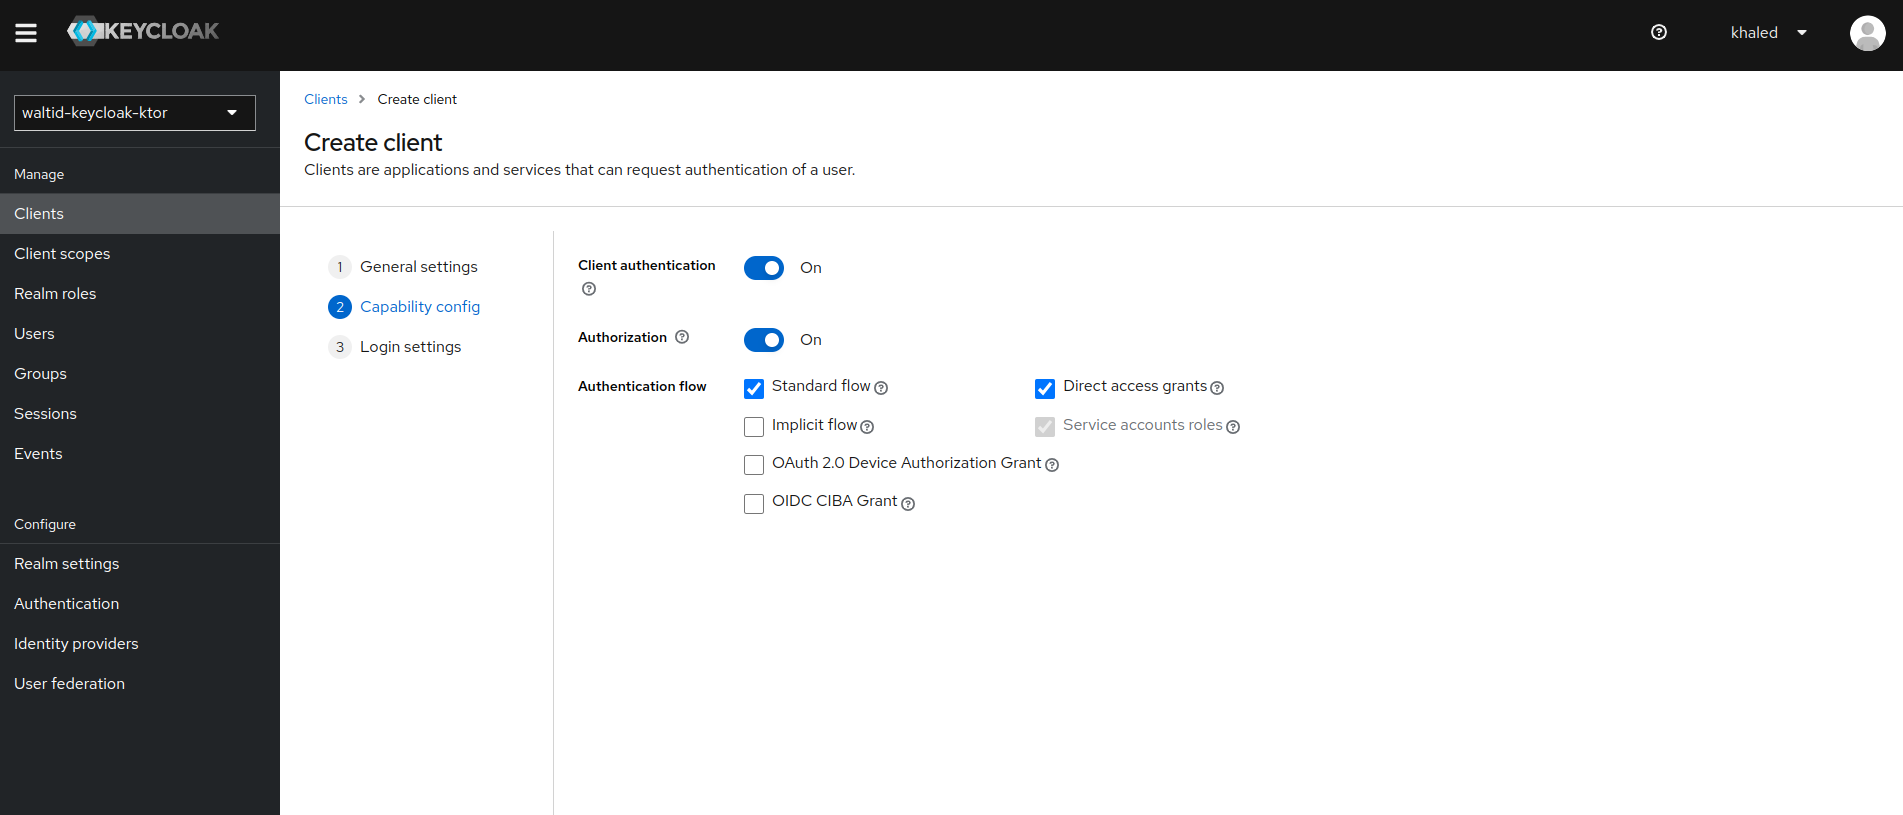
- Client Capability Configuration
Configure client capabilities:
- Login Settings in Client Config :

1.Root URL : Public root URL of the wallet.
2. Home URL : Default URL for redirects or links.
3. Valid URI pattern for successful login redirects (wildcard: *).
4. Web origins : Allowed CORS origins.
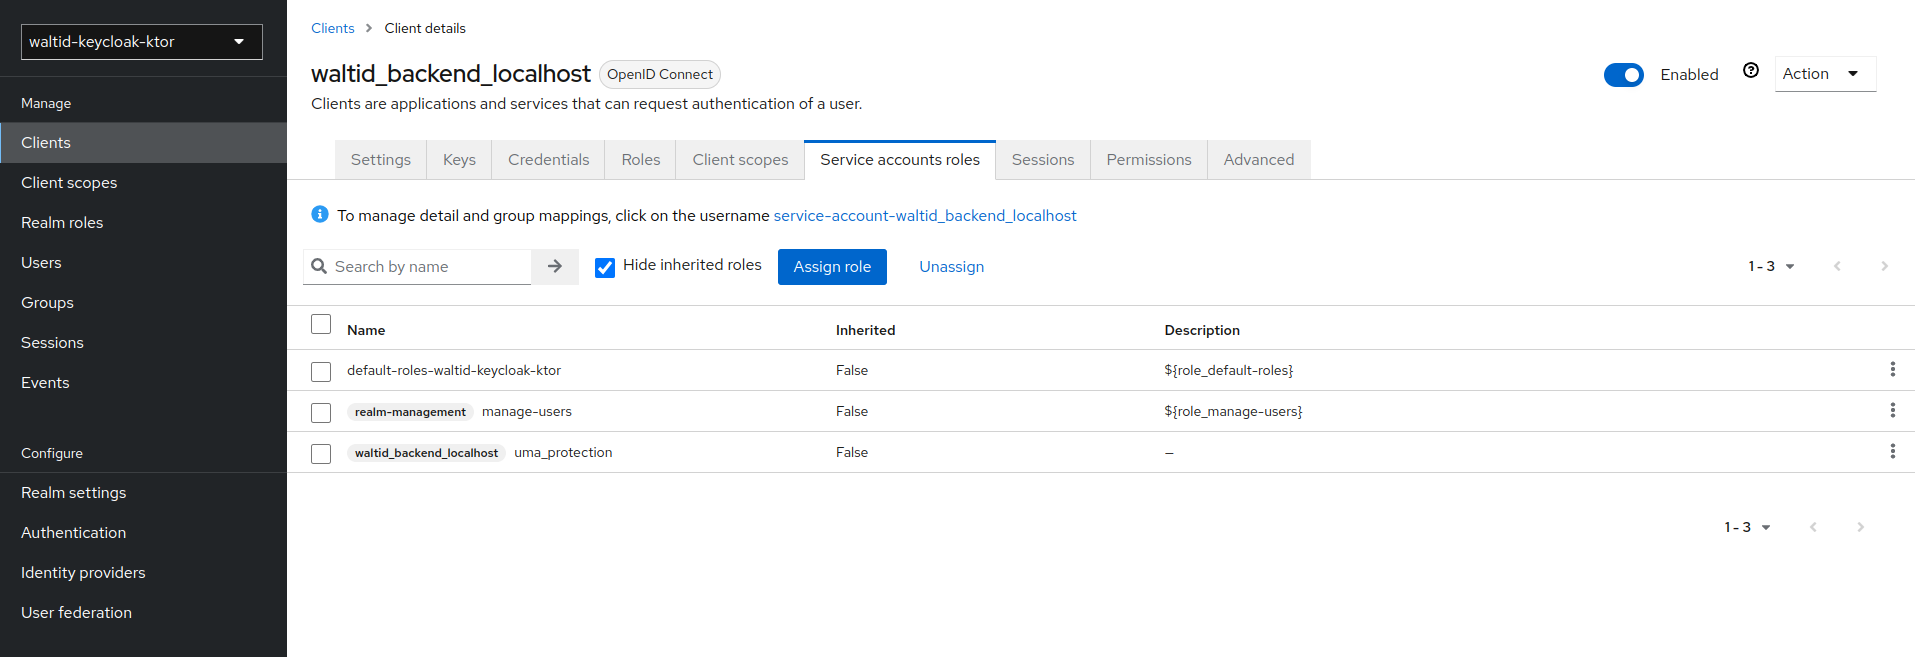
Service Account Configuration
To use the Keycloak user API, you need to add a service account role in Keycloak. This role is used to authenticate a user using the username and password.
- Go to the Keycloak admin console and select the realm you want to use.
- Go to the client waltid_backend and select the
Service Account Rolestab. - Add the
manage-usersrole to the service account.
Token exchange for user impersonation Configuration
User impersonation in Keycloak allows one user to obtain a token that represents another user, enabling them to perform actions on behalf of that user. This process involves exchanging a token granted to the acting user with another token representing the target user.
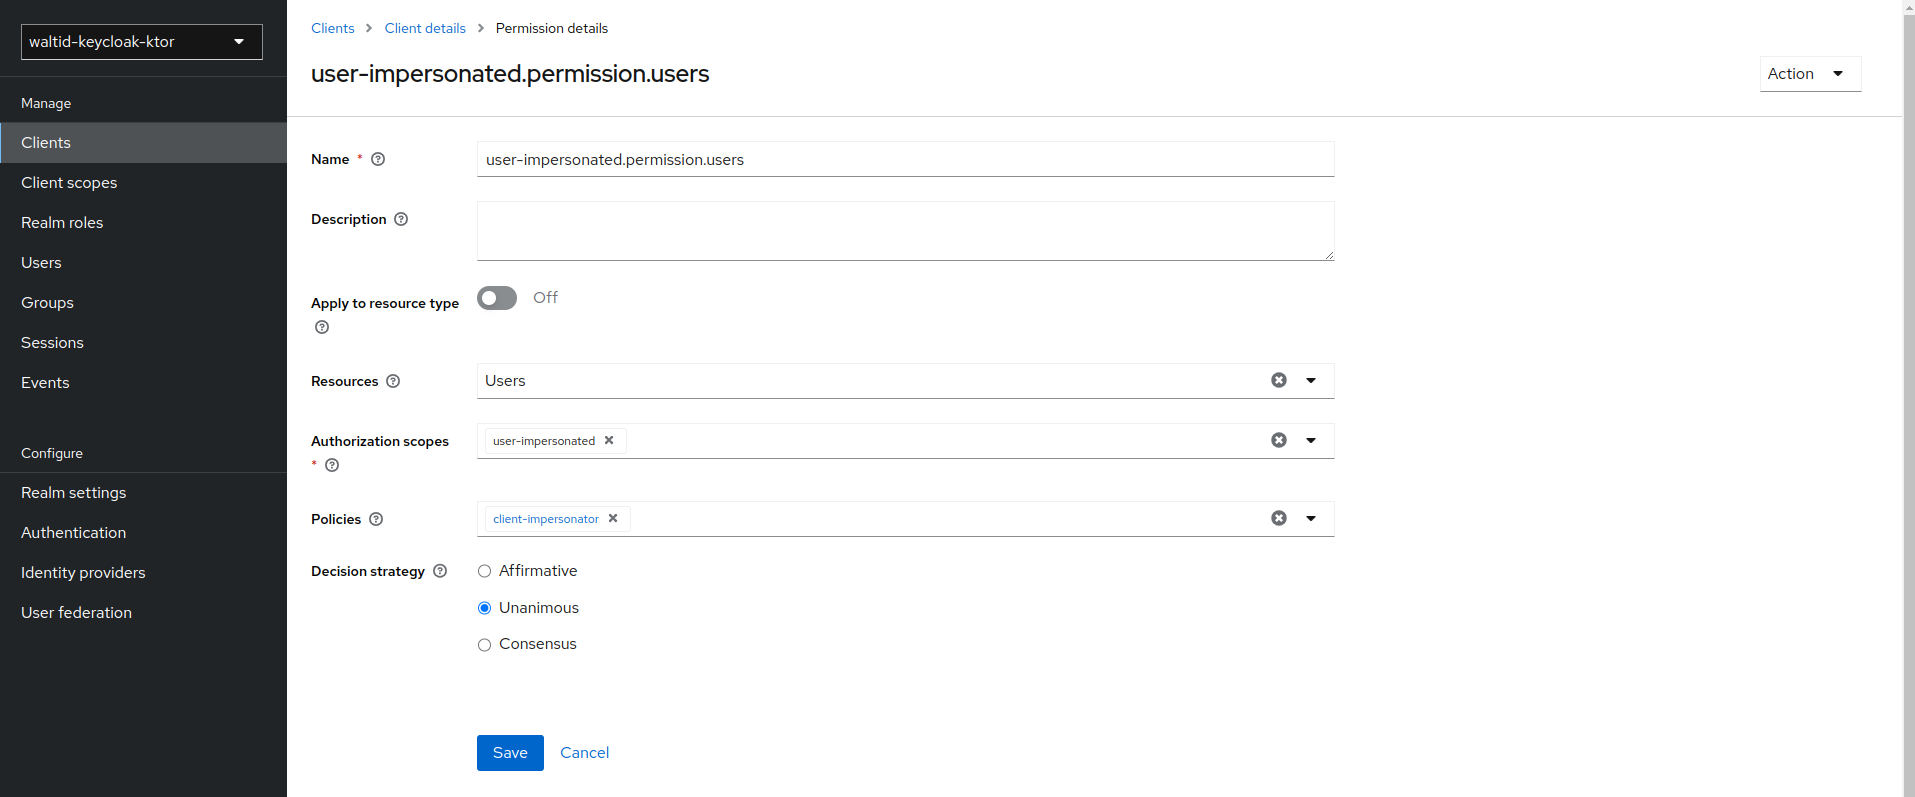
To granting permission for the exchange of tokens , you need to define a token-exchange fine grain permission in the target client you want permission to exchange to.
- Go to the Keycloak admin console and select the realm waltid-keycloak-ktor.
- Go to the client waltid_backend and select the
Permissionstab. - Toggle Permissions Enabled to On.
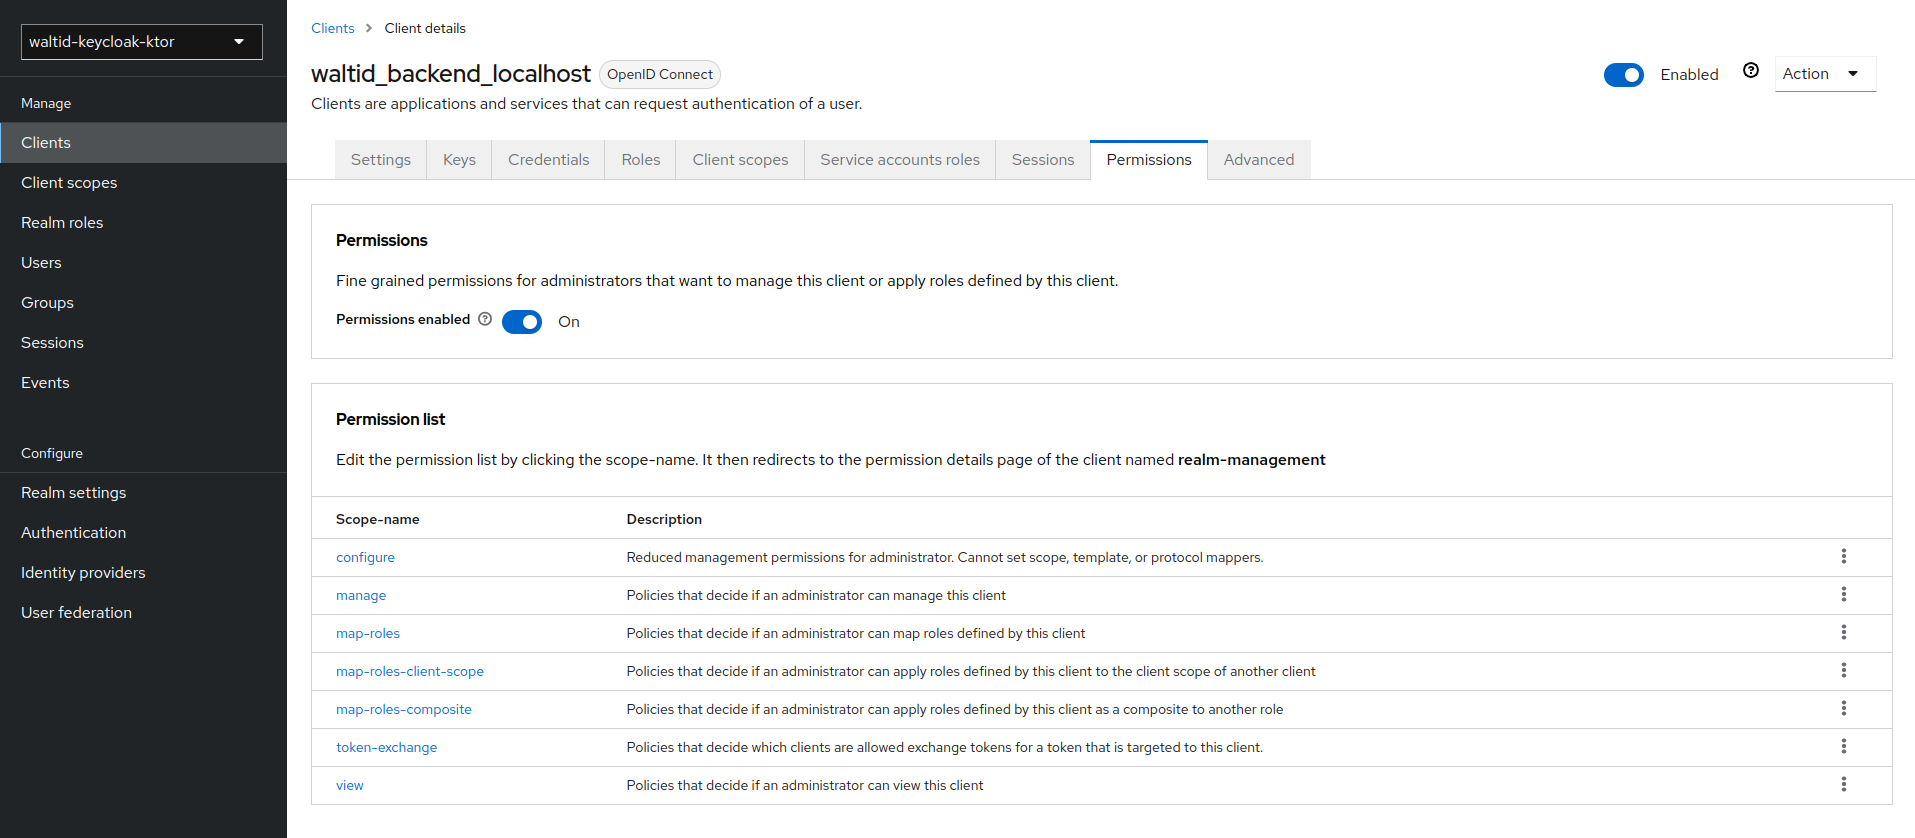
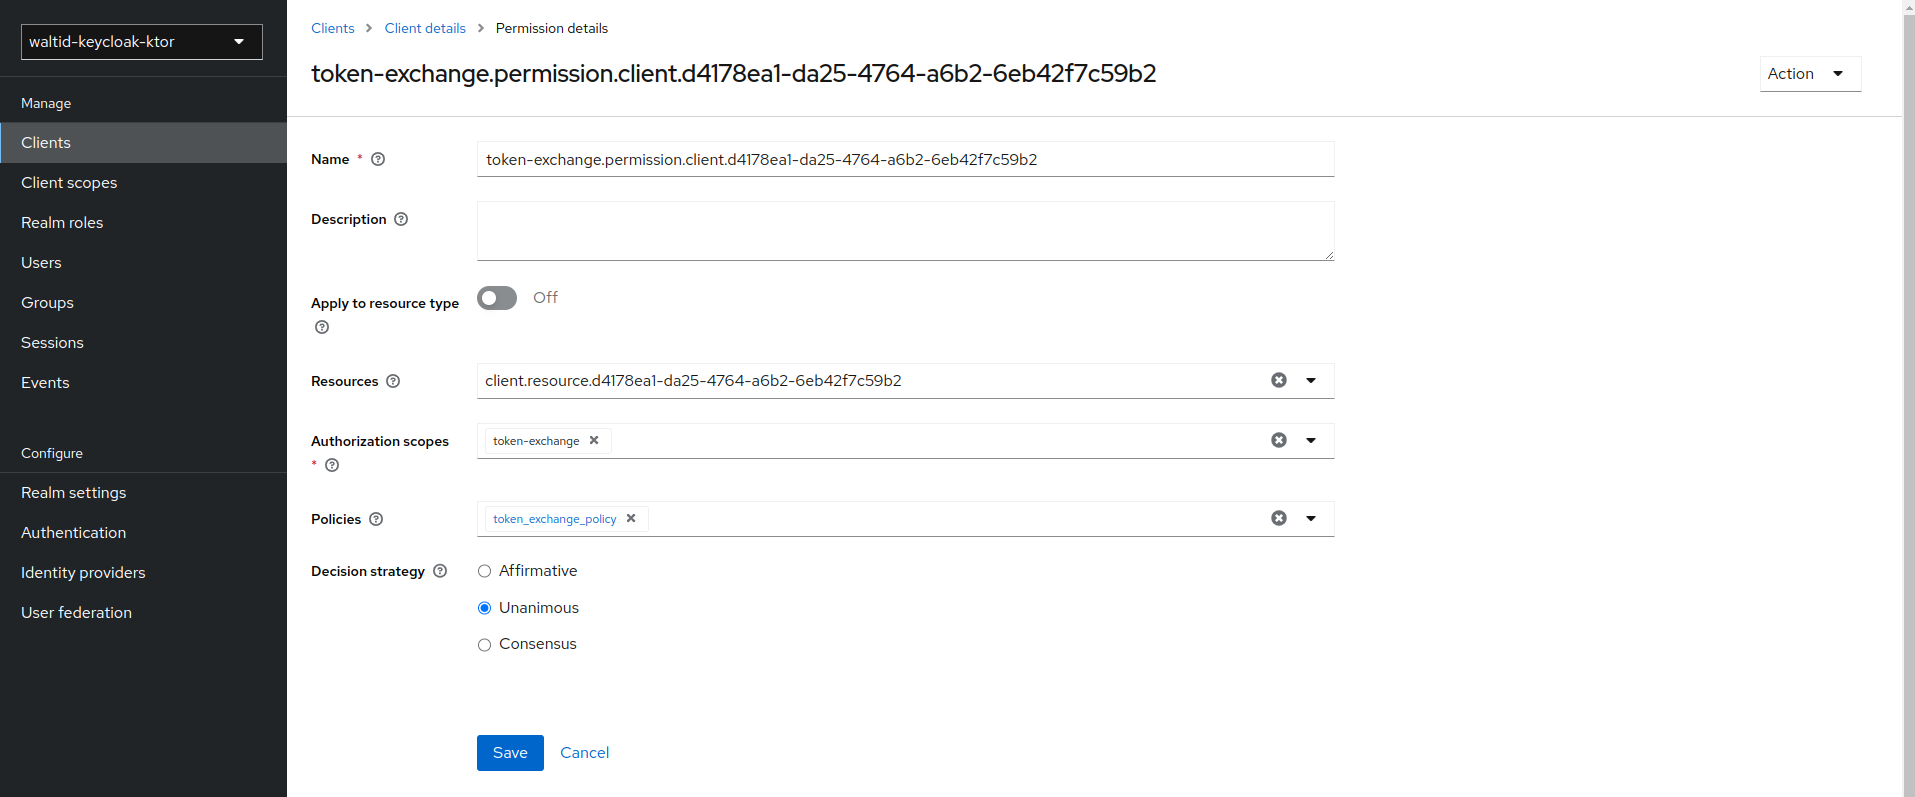
- Click on the token-exchange link and add the
token-exchangepermission to the client.

- Click Client details in the breadcrumbs at the top of the screen.
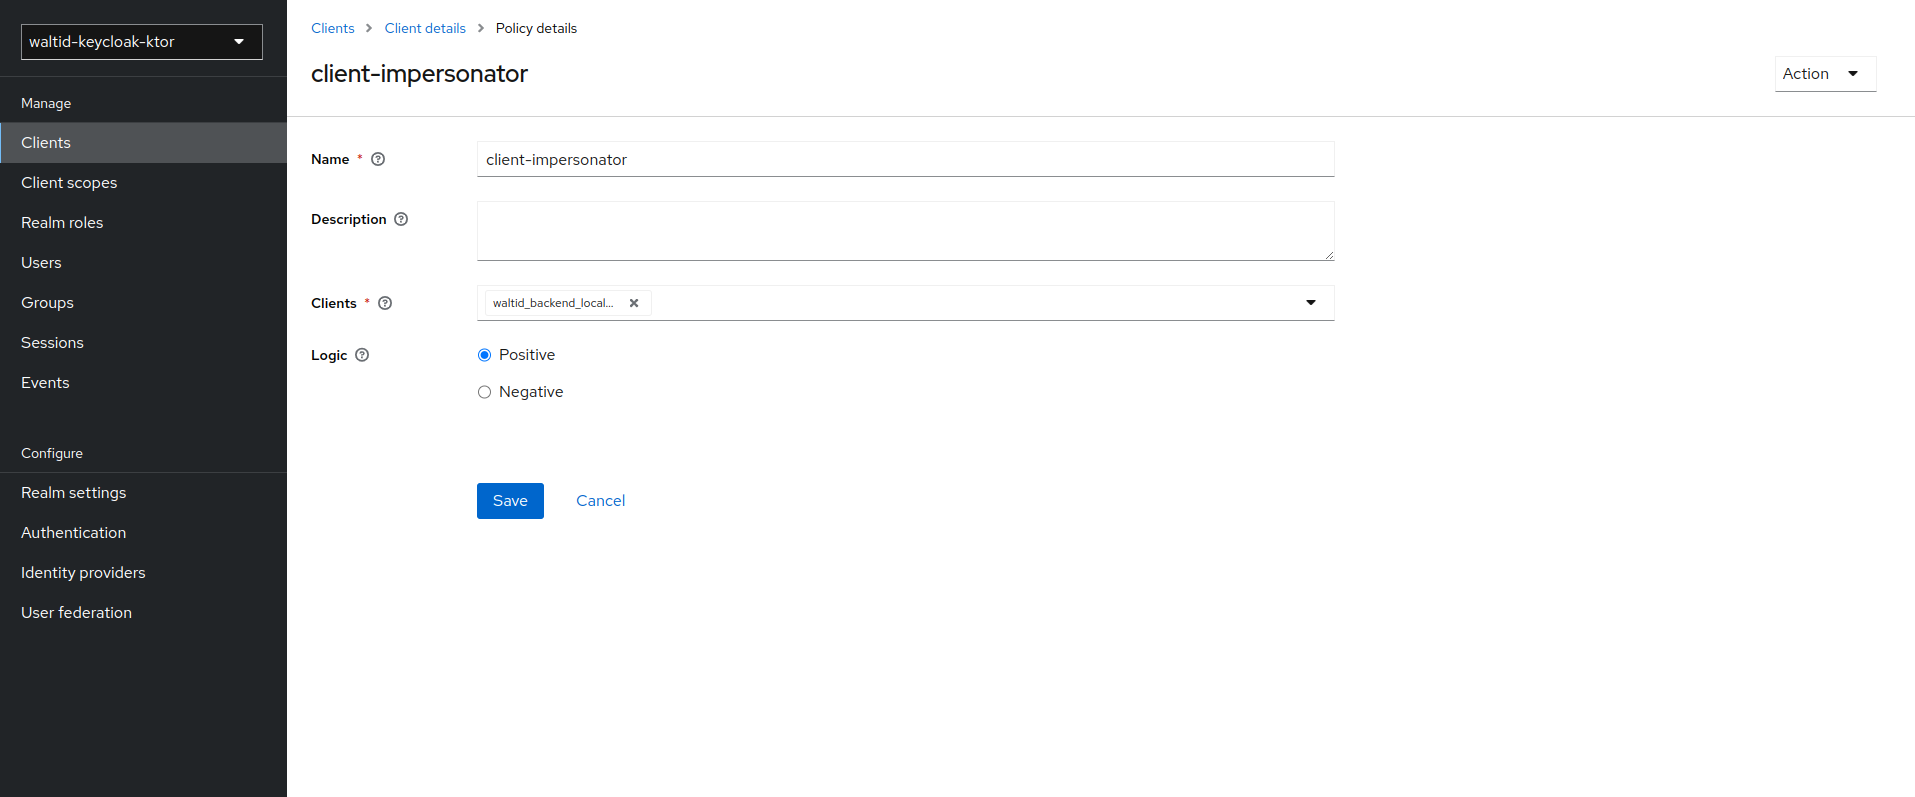
Define a policy for this permission
- Click Authorization in the breadcrumbs at the top of the screen.
- Click Policies in the breadcrumbs at the top of the screen.
- Click Create Policy.
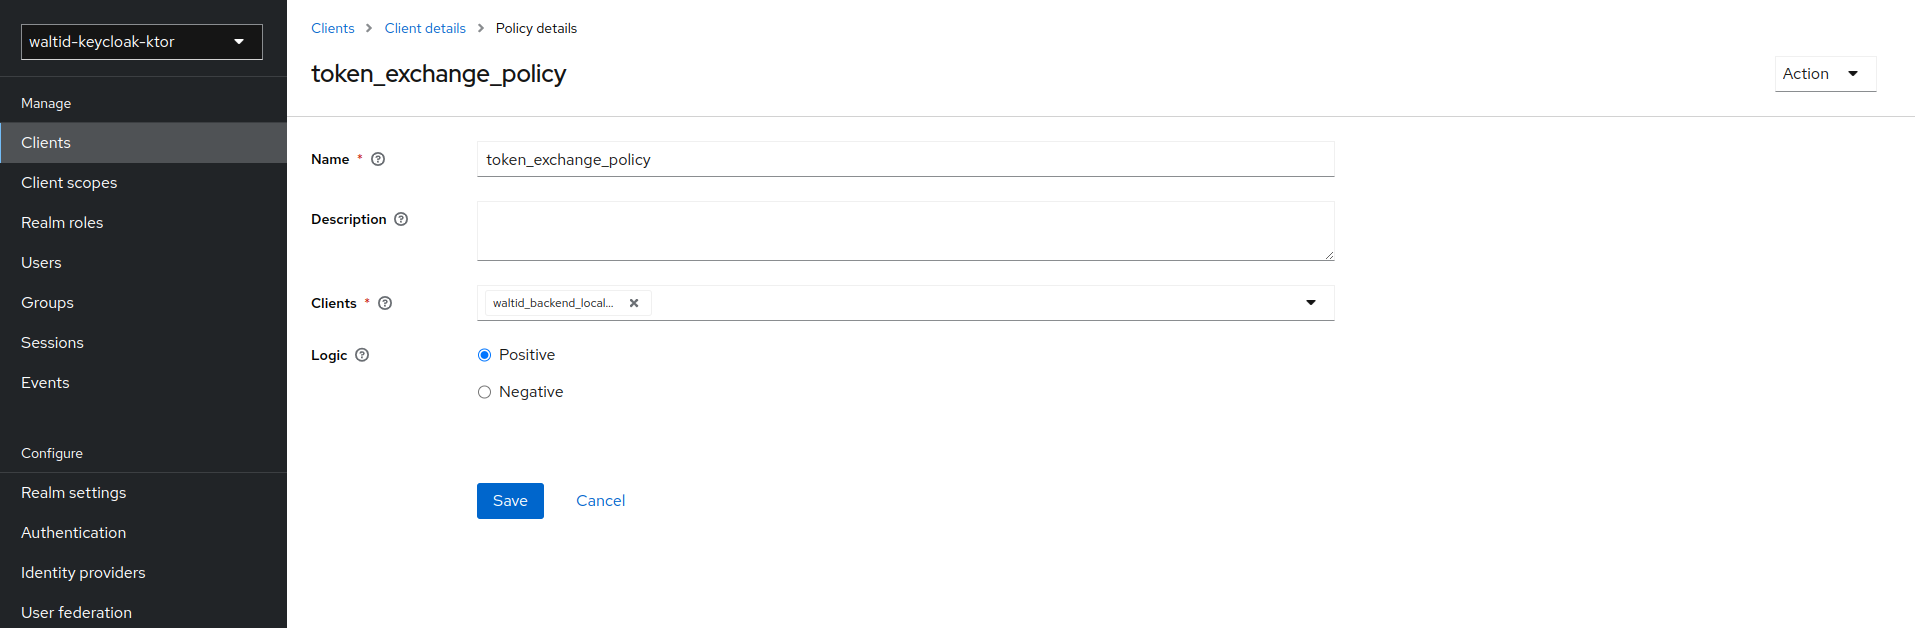
- After you create this policy, go back to the target client’s token-exchange permission and add the client policy you just defined.
Apply Client Policy
Impersonation Configuration
- Go to the Keycloak admin console and select the realm you want to use.
- Go to the Users tab in the left-hand menu.
- Go to permissions .
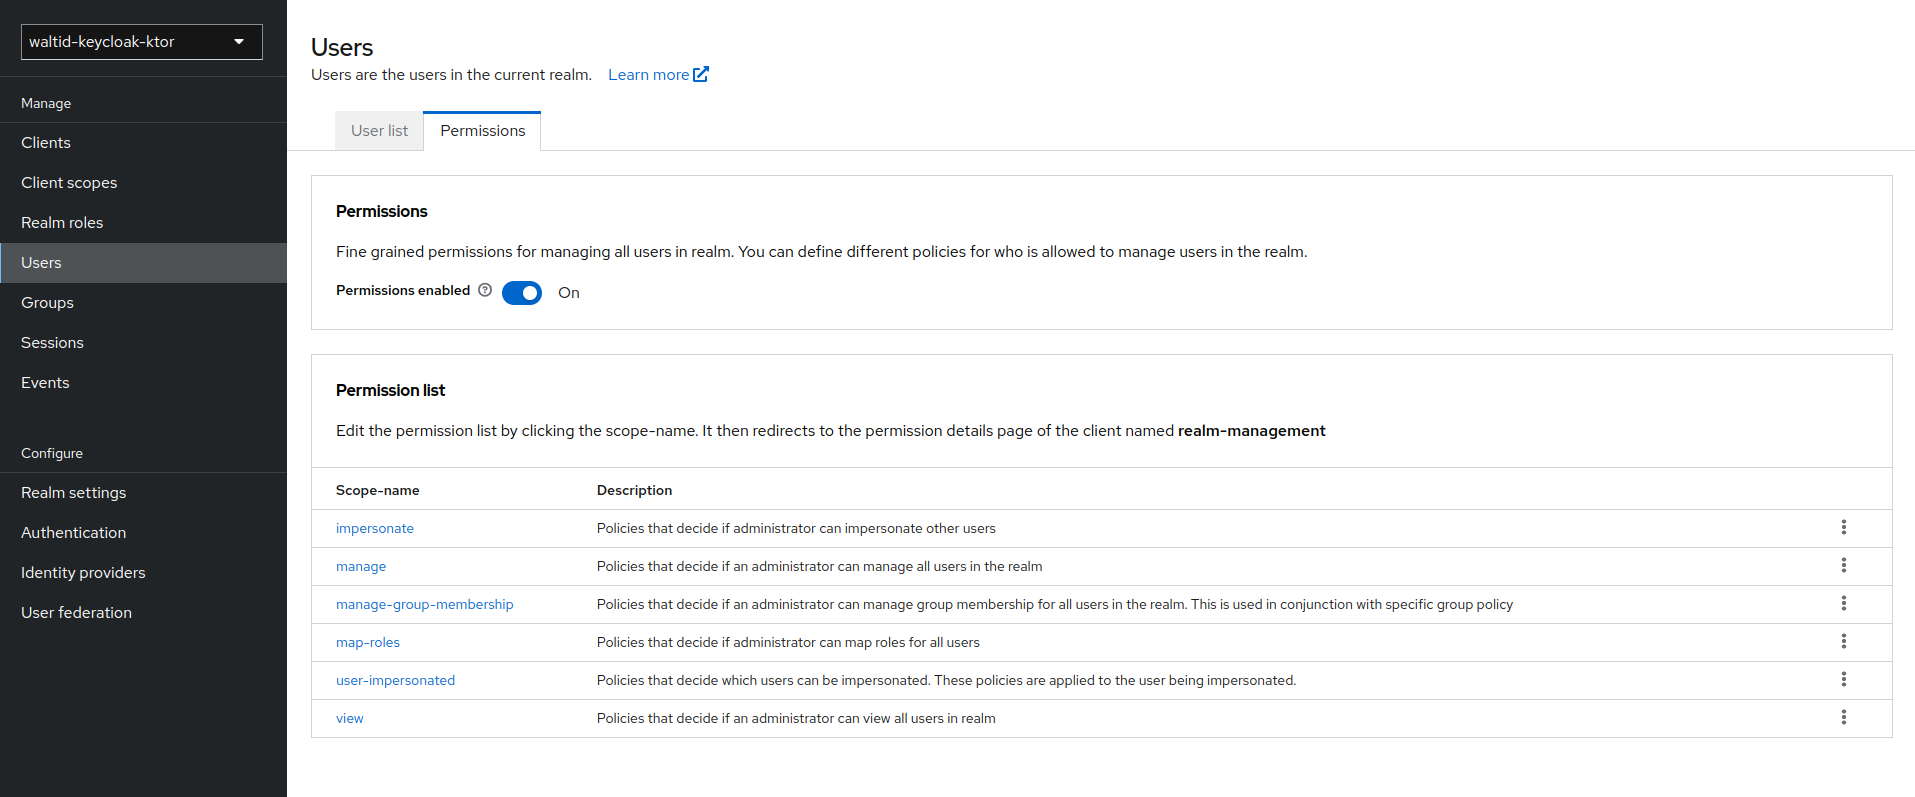
- Click on the impersonate link and click the
impersonatelink.
- Click Client details in the breadcrumbs at the top of the screen.
Define a policy for this permission
- After you create this policy, go back to users' impersonation permission and add the client policy you just defined.
Apply Client Policy

Keycloak integration in wallet-api
Read here how to configure wallet-api to support Keycloak login.
Keycloak provider configuration
Update OIDC config file in config/oidc.conf:
enableOidcLogin = true
providerName = keycloak
oidcRealm = "https://keycloak.walt-test.cloud/realms/waltid-keycloak-ktor"
oidcJwks = "${oidcRealm}/protocol/openid-connect/certs"
authorizeUrl = "${oidcRealm}/protocol/openid-connect/auth"
accessTokenUrl = "${oidcRealm}/protocol/openid-connect/token"
logoutUrl = "${oidcRealm}/protocol/openid-connect/logout"
clientId = "waltid_backend"
keycloakUserApi = "https://keycloak.walt-test.cloud/admin/realms/waltid-keycloak-ktor/users"
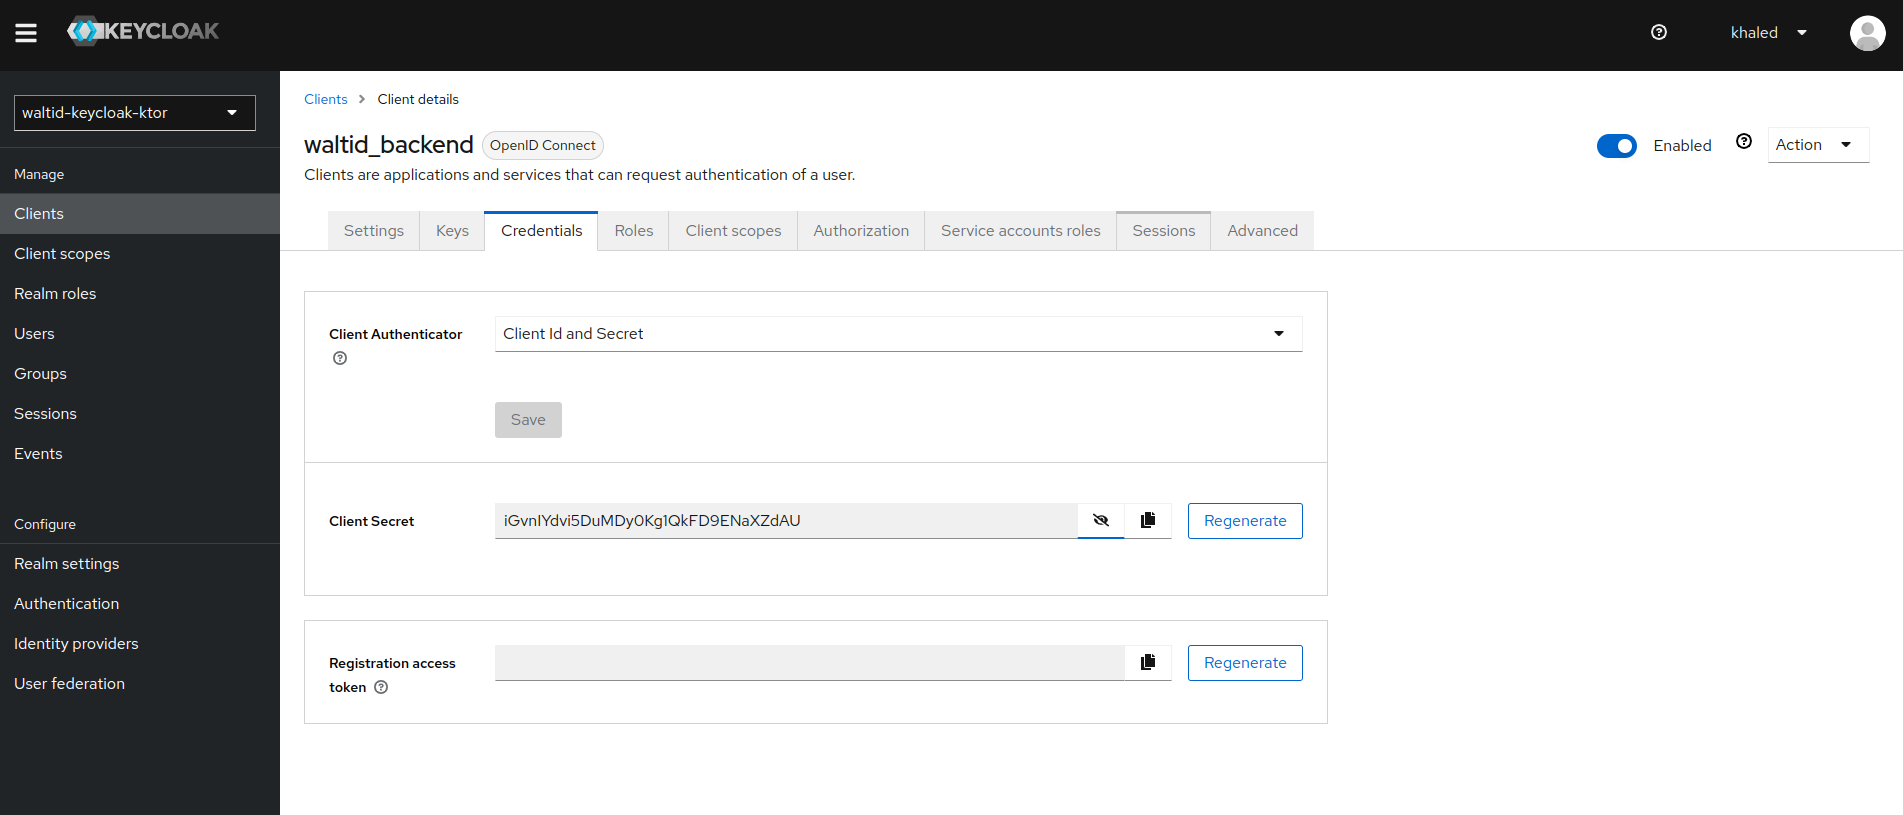
clientSecret = "..."
jwksCache = {
cacheSize = 10
cacheExpirationHours = 24
rateLimit: {
bucketSize: 10
refillRateMinutes: 1
}
}
oidcRealm: The realm base URL:<keycloak-URL>/realms/<realm-name>clientId: Specify the client ID created in Keycloak.clientSecret: The client secret is generated by Keycloak (found inclients -> <client_name> -> credentials):